

DTF printers are workhorses — but they’re not self-cleaning. The white ink that makes DTF so versatile is also the #1 cause of printhead failure. Titanium dioxide (TiO₂) particles settle within hours of inactivity, clogging dampers, ink lines, and nozzles.
Here’s the reality: 80% of DTF printer breakdowns trace back to poor cleaning and white ink neglect (Inkbank, 2026). Preventive maintenance costs 10–15% of what reactive repairs cost (DTF Database). A neglected white ink system for just 2–3 days can permanently destroy a printhead — $900–$3,000 replacement depending on the model.
This guide gives you a complete, time-quantified maintenance schedule (daily/weekly/monthly/quarterly), step-by-step cleaning procedures, printhead-specific care for XP600 and i3200, and the shaker/dryer maintenance that most guides skip entirely.
This article is for: Print shop owners, production managers, and operators who run DTF equipment daily and need a practical SOP — not a sales pitch.
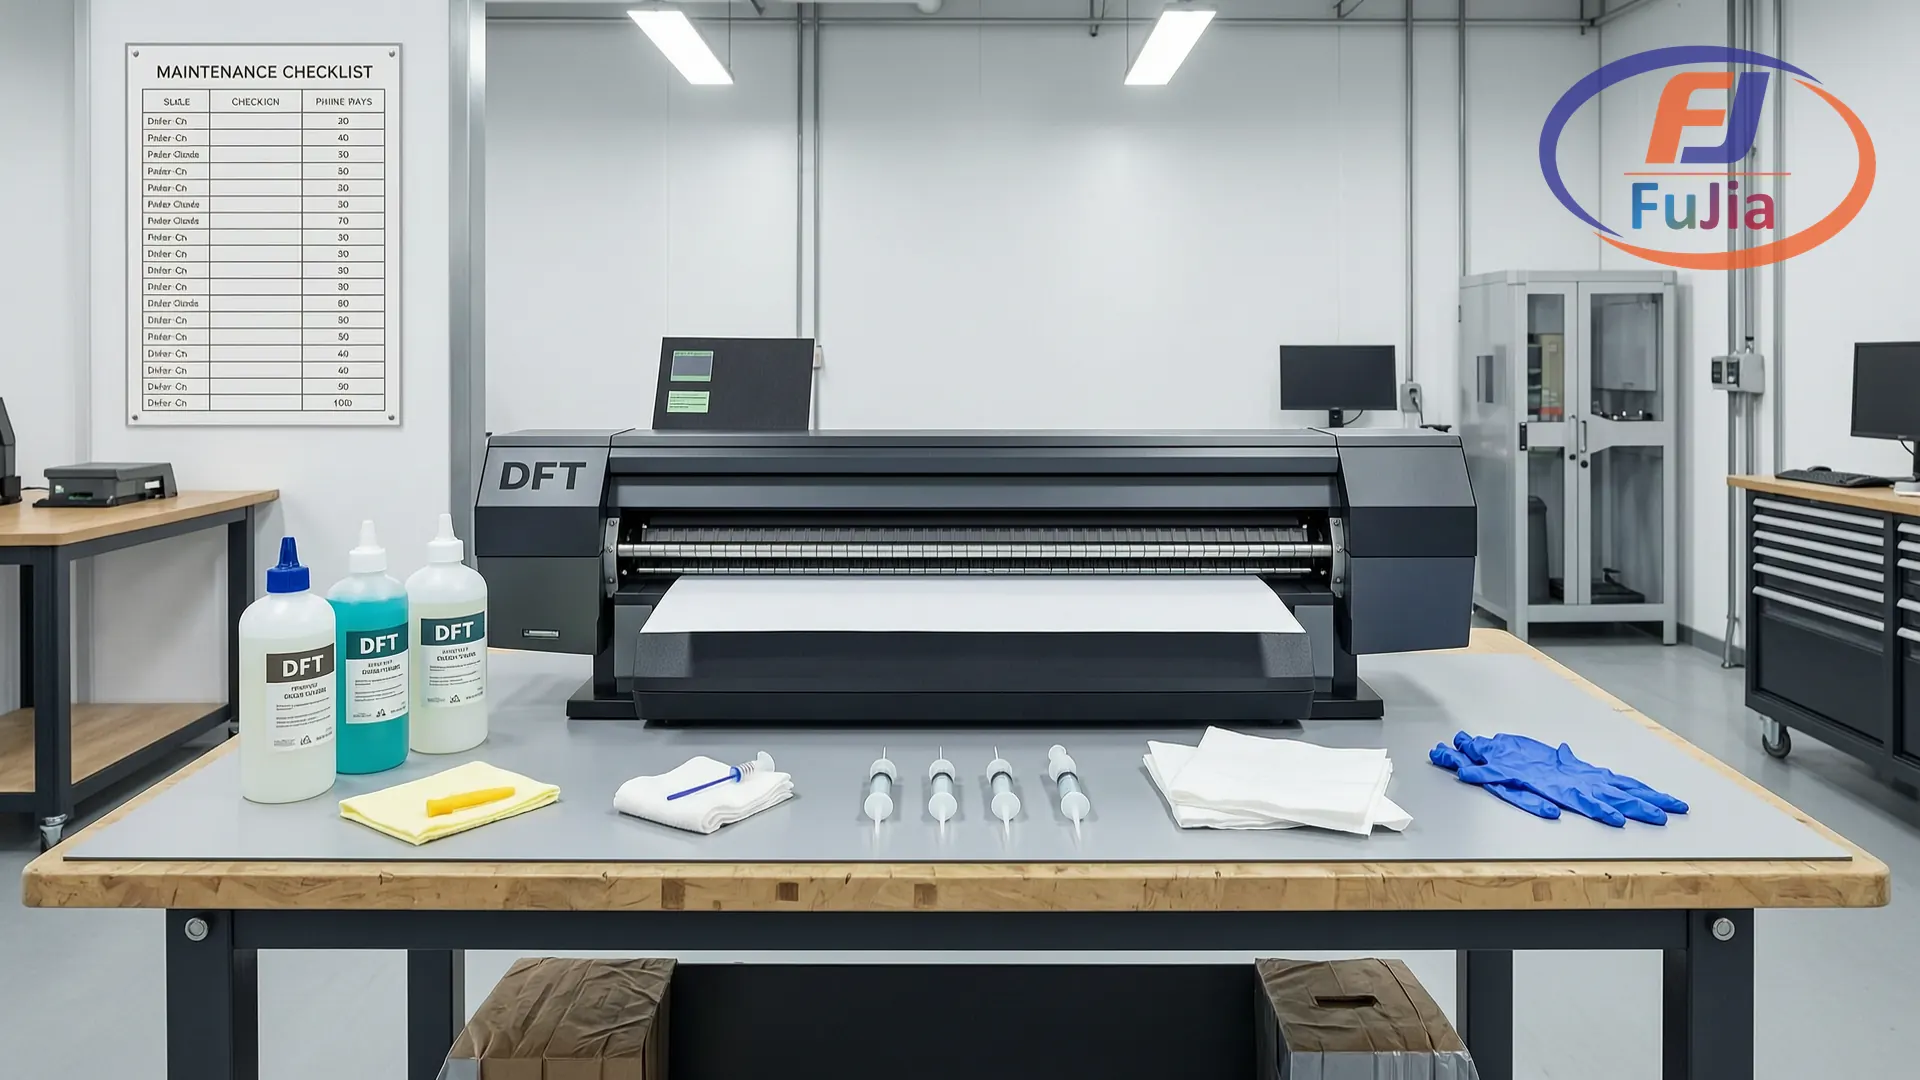
Why DTF Printers Need More Maintenance Than Other Printers
DTF isn’t just a printer. It’s a printer + powder shaker + curing oven system. Each component has its own maintenance needs, and neglecting any one of them creates downstream problems.
The white ink is the core challenge. Unlike CMYK inks where pigment particles stay suspended relatively well, DTF white ink uses titanium dioxide — a dense, heavy pigment with a specific gravity of ~4.2. TiO₂ begins settling within 2–4 hours of inactivity. Within 24 hours, sediment builds up in dampers. Within 48–72 hours, you’re looking at significant clogs that automatic cleaning cycles can’t clear (AA Print Supply Co).
Compare this to sublimation or eco-solvent printers, which can sit for days without major issues. DTF demands daily attention whether you print or not.
| Printer Type | Max Idle Time Before Risk | Daily Maintenance Required |
|---|---|---|
| DTF | 24 hours (white ink) | Yes — shake white ink, nozzle check |
| DTG | 24–48 hours | Yes — but automated on most models |
| Sublimation | 3–5 days | No — nozzle check weekly is fine |
| Eco-solvent | 7+ days | No |
Setting Up the Right Environment
Maintenance starts before you touch the machine. A poor environment accelerates every failure mode.
Temperature & Humidity
- Temperature: 68–78°F (20–26°C). Below 60°F, ink viscosity increases and flow suffers. Above 85°F, solvent evaporation accelerates nozzle drying.
- Humidity: 40–60% RH. Below 35%, nozzles dry faster between prints. Above 65%, powder clumps and film adhesion drops.
- Tool: A $10–$20 digital hygrometer (ThermoPro TP50) placed near the printer’s air intake tells you exactly what the printhead experiences.
Powder Dust Control
DTF powder is a fine thermoplastic polyurethane (TPU) particle. During shaking and curing, airborne powder settles on:
- Encoder strips — causes banding and misalignment
- Linear rails — increases carriage friction and wear
- Printhead nozzle plate — contaminates ink droplets
- Operator lungs — TPU dust inhalation is an occupational health risk
Required controls:
– Local exhaust ventilation (LEV) above the shaker/oven — minimum 200 CFM extraction
– HEPA air purifier in the print room (e.g., LEVOIT Core 300, ~$80)
– Operators wear N95 masks during powder handling and shaker cleaning
– Anti-static mat under the shaker — static attracts powder to every nearby surface
Daily Maintenance Checklist (5–10 Minutes)
Do this every production day. If the machine sits idle, still do items 1–3.
| # | Task | Time | Priority | How |
|---|---|---|---|---|
| 1 | Shake white ink | 1 min | Critical | Invert and shake white ink cartridge/tank for 30–60 seconds. If your model has auto-circulation, verify the pump is running. |
| 2 | Print nozzle check | 2 min | Critical | Before any production run. All CMYK+W channels must show complete, unbroken lines. |
| 3 | Run cleaning cycle (if needed) | 3–5 min | Critical | If nozzle check shows gaps, run 1–2 automatic cleaning cycles. Stop after 3 failed attempts — switch to manual cleaning. Continuing beyond 3 cycles wastes ink and can damage the capping station seal. |
| 4 | Check ink levels | 30 sec | High | No channel should drop below 20%. Low ink pulls air into the lines, which causes airlock clogs that are harder to clear than sediment clogs. |
| 5 | Wipe exterior & platen | 1 min | Medium | Use a lint-free dry cloth to remove ink mist, powder residue, and dust from the print bed and machine surfaces. |
| 6 | Clean capping station & wiper | 2 min | High | Use a DTF-specific cleaning solution and a polyurethane foam swab (not cotton — it sheds fibers). Wipe the rubber seal and wiper blade to remove dried ink buildup. |
| 7 | Check PET film path | 30 sec | Medium | Inspect feed rollers for powder/adhesive residue. Clean if needed to prevent film skew or jams. |
Pro tip: Print your nozzle check pattern on a small strip of PET film rather than wasting a full sheet. Most RIP software (CadLink, AcroRIP, Maintop) lets you print a test strip at 10–15cm width.

Weekly Maintenance Checklist (30–45 Minutes)
| # | Task | Time | Priority | How |
|---|---|---|---|---|
| 1 | Clean encoder strip | 5 min | Critical | Use distilled water only on a lint-free cloth. Gently wipe the strip — never use cleaning solution or alcohol, which dissolves the printed graduations and causes permanent positioning errors. |
| 2 | Check & empty waste ink tank | 5 min | High | Empty when it reaches 75% capacity. Overflowing waste ink can back-flow into internal components and cause electrical damage. |
| 3 | Inspect ink tubes for air/damage | 5 min | High | Look for bubbles (indicates air leak or low ink), discoloration in white ink line (sediment buildup), kinks, or cracks. Gently flex tubes or run an ink agitation cycle if sediment is visible. |
| 4 | Clean film feed rollers & path | 10 min | Medium | Remove hot-melt powder and adhesive residue with IPA (isopropyl alcohol) on a lint-free cloth. Ensure rollers spin freely. |
| 5 | Clean powder shaker mesh & collection tray | 10 min | High | Empty the powder collection tray. Brush the shaking mesh with a soft brush to remove caked powder. Check the vibration motor mounts for looseness. |
| 6 | Check curing oven temperature consistency | 5 min | Medium | Use an infrared thermometer to verify the oven’s actual surface temp matches the display. A ±10°C variance is normal; beyond that, recalibrate or contact support. |
Monthly Maintenance Checklist (1–2 Hours)
| # | Task | Time | Priority | How |
|---|---|---|---|---|
| 1 | Inspect & replace dampers | 15 min | Critical | Remove each damper and check for darkening, ink flow restriction, or physical damage. Replace if discolored or if print quality issues persist after cleaning. Dampers cost $15–$40 for a full set. |
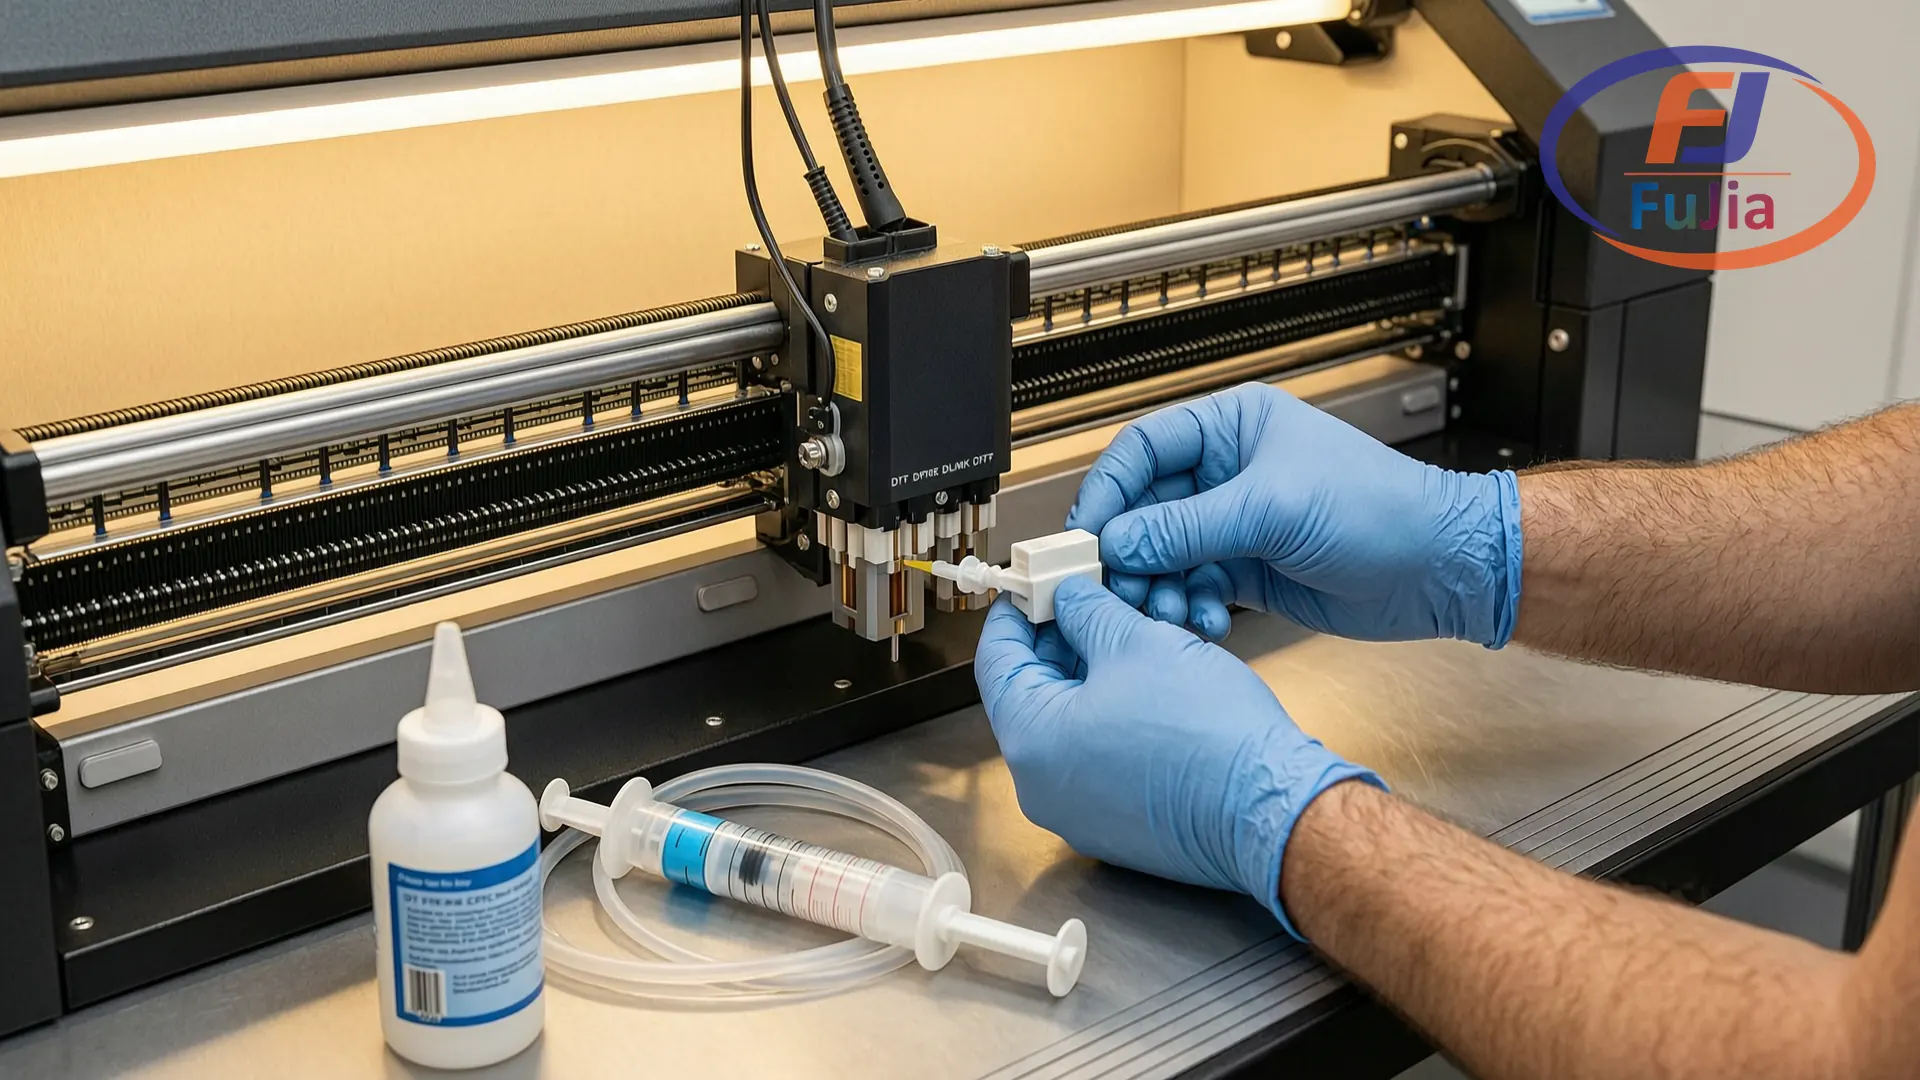
| 2 | Flush ink lines | 20 min | High | Use manufacturer-approved DTF cleaning solution. Follow your machine’s specific flushing procedure (typically involves syringe + silicone tube connected to the damper port). Flush until the solution runs clear. |
| 3 | Deep clean printhead surface | 15 min | Critical | Apply DTF cleaning solution to a lint-free cloth. Wipe in ONE direction only — never back-and-forth. Back-and-forth wiping pushes dried ink particles into the micron-level nozzles, worsening clogs (Inkbank). |
| 4 | Check belt tension & rail lubrication | 15 min | Medium | Press the carriage belt — it should deflect ~5mm under moderate finger pressure. Lubricate linear rails per the manufacturer’s manual (use the specified grease type — wrong grease attracts powder and turns into abrasive paste). |
| 5 | Update RIP software & firmware | 10 min | Medium | Back up your ICC profiles and print settings first. Updates often fix banding issues, improve white ink laydown algorithms, and add media profiles. |
| 6 | Full machine calibration | 20 min | High | Print calibration patterns and check for alignment accuracy, color consistency, and banding. Run the built-in alignment procedure if needed. Recalibrate ICC profiles if you’ve changed ink batches or media suppliers. |
| 7 | Clean oven heating elements & exhaust | 15 min | High | Turn off and cool completely. Brush accumulated powder from heating elements (fire hazard). Check exhaust duct for powder blockage — restricted airflow causes uneven curing and overheating. |
White Ink: The Variable That Breaks Everything
White ink deserves its own section because it’s responsible for the majority of DTF downtime. Understanding why it clogs helps you prevent it.
The Chemistry
DTF white ink contains titanium dioxide (TiO₂) pigment particles with an average size of 0.2–0.5 microns. TiO₂ has a specific gravity of ~4.2 — meaning it’s over 4 times denser than water. When the ink sits still, gravity pulls these particles down. They accumulate in:
- Dampers — the first bottleneck. Darkened dampers mean TiO₂ has settled into a paste.
- Ink lines — especially horizontal runs where flow velocity drops.
- Printhead nozzles — the final bottleneck. Each nozzle is 20–30 microns wide. A small TiO₂ cluster can block it completely.
CMYK inks use organic pigments with much lower specific gravity (~1.5–2.0). They stay suspended far longer and rarely cause the same level of sediment clogging.
The Weekend Problem
This is the most common scenario we see: a shop prints heavily Monday–Friday, shuts down Friday evening, and comes back Monday morning to a clogged white channel.
What happened: 60+ hours of inactivity. TiO₂ settled, compacted, and partially crystallized in the dampers and nozzle plate. Monday’s automatic cleaning cycle pushes fresh ink against a hardened TiO₂ plug — it doesn’t dissolve, it just compresses further.
The fix — Friday shutdown routine:
1. Run 2 automatic cleaning cycles before powering off.
2. If your printer supports it, enable “sleep mode” with auto-circulation (keeps white ink moving at low intervals during idle periods).
3. If no auto-circulation: manually inject 2–3ml of cleaning solution into the capping station (wet capping), park the printhead over it, and let it soak over the weekend. This keeps the nozzle plate hydrated.
Monday startup routine:
1. Shake white ink for 60 seconds.
2. Run 2–3 automatic cleaning cycles.
3. Print nozzle check. If gaps remain, move to manual cleaning (see Step 5 below).
Printhead-Specific Care: XP600 vs i3200
Not all printheads are equal. The maintenance frequency and approach differ significantly:
| Factor | Epson XP600 | Epson i3200-A1 |
|---|---|---|
| Typical DTF lifespan | 3–5 months | 4–8 months |
| Replacement cost | $150–$250 | $500–$800 |
| Nozzle count | 1,440 (6 colors × 240) | 3,200 (8 colors × 400) |
| White ink sensitivity | High — narrower ink channels clog faster | Moderate — wider channels but higher flow volume |
| Cleaning frequency | Daily nozzle check essential; deep clean every 2 weeks | Daily nozzle check; deep clean monthly is usually sufficient |
| Max automatic cleaning cycles | 3 per session (more risks damage) | 3 per session |
| Wet capping safe? | Yes, 15–20 min max | Yes, 15–30 min |
Key takeaway: XP600 is cheaper to replace but more fragile — it needs more frequent attention. i3200 is more robust but far more expensive when it does fail. Both die from the same cause: white ink neglect.
Step-by-Step: How to Clean a Clogged DTF Printhead
When automatic cleaning fails (3 attempts, nozzle check still shows gaps), move to manual cleaning. You’ll need:
- DTF-specific cleaning solution (never use Windex, ammonia-based cleaners, or generic alcohol — they damage internal printhead coatings)
- Polyurethane foam swabs (not cotton swabs — fibers shed and clog nozzles)
- 5ml syringe with silicone tubing
- Lint-free wipes
- Nitrile gloves
Step 1: Power Off & Prep
Turn off the printer and unplug it. Release the carriage lock manually and move the printhead to the center of the rail for access.
Step 2: Clean the Capping Station & Wiper Blade
Soak a polyurethane swab in DTF cleaning solution. Gently wipe the rubber seal of the capping station and the wiper blade. Dried ink here prevents proper sealing during idle periods, which accelerates nozzle drying.
Step 3: Wipe the Printhead Nozzle Plate
Apply cleaning solution to a lint-free cloth. Wipe in one direction only — left to right or right to left, never back-and-forth. Use minimal pressure. The nozzle plate is precision-machined; scratching it causes permanent print defects.
Step 4: Wet Capping (Moderate Clogs)
- Place 2–3ml of cleaning solution into the capping station well.
- Move the printhead back to its parked position (over the capping station).
- Let it soak for 15–30 minutes. The solution dissolves hardened TiO₂ deposits on the nozzle plate.
- After soaking, run 1–2 automatic cleaning cycles and print a nozzle check.
90% of moderate clogs resolve at this stage (Inkbank).
Step 5: Syringe Flush (Severe Clogs)
If wet capping doesn’t work, the clog is deeper — likely in the damper or ink line.
- Remove the damper for the affected channel.
- Attach a silicone tube to the printhead’s ink inlet port.
- Fill a 5ml syringe with cleaning solution.
- Gently push 2–3ml through the port. Never force it — excessive pressure can delaminate the nozzle plate.
- Reattach the damper, run 2 cleaning cycles, and print a nozzle check.
⚠️ Warning: If you’re not comfortable with Step 5, stop. Forcing solution or using the wrong technique can permanently damage the printhead. Contact your supplier’s technical support instead. For guidance on choosing a supplier with reliable after-sales support, see our DTF printer supplier evaluation guide.
Troubleshooting: Quick Reference
| Symptom | Likely Cause | Fix | Estimated Cost |
|---|---|---|---|
| Banding in prints | Dirty encoder strip, misaligned printhead, or clogged nozzles | Clean encoder strip (distilled water only), run alignment, nozzle check + clean | $0–$50 |
| White ink not printing | TiO₂ sediment in damper or nozzle clog | Shake white ink → auto-clean ×2 → wet cap → syringe flush | $0–$200 (damper replacement) |
| Poor color saturation | Low ink levels, air in lines, or ICC profile mismatch | Check ink ≥20%, bleed air from lines, verify ICC profile | $0–$10 |
| Film feeding skewed | Dirty/powder-covered feed rollers | Clean rollers with IPA | $0 |
| Uneven powder application | Clogged shaker mesh or worn vibration motor | Clean mesh, check motor mounts | $0–$80 |
| Prints not curing properly | Oven temp variance or blocked exhaust | Verify temp with IR thermometer, clean heating elements & exhaust | $0 |
| Head strike on film | Film not flat, suction not working, or carriage height wrong | Check film feed, vacuum fan, adjust head height | $0–$50 |
Maintenance Cost vs. Doing Nothing
Here’s the math that makes maintenance non-negotiable:
| Scenario | Cost | Downtime |
|---|---|---|
| Daily maintenance supplies (cleaning solution, swabs, wipes) | $20–40/month | 5 min/day |
| Weekly deep clean supplies | $10–20/month | 30–45 min/week |
| Monthly damper replacement (preventive) | $15–40/month | 1–2 hours/month |
| Total preventive cost | $45–100/month | ~3 hours/month |
| Reactive: Clogged printhead replacement | $900–$3,000 | 1–3 days |
| Reactive: Full ink system flush (service call) | $200–$500 | 1 day |
| Reactive: Mainboard damage from waste ink overflow | $500–$1,200 | 3–5 days |
| Lost production during downtime | $200–$1,000/day | Variable |
Preventive maintenance costs roughly 10–15% of reactive repair costs and prevents 80–90% of major failures (DTF Database). The numbers are unambiguous.
Maintenance Log Template
Keep a printed log next to the printer. It serves two purposes: accountability (operators actually do the tasks) and warranty evidence (manufacturers often require maintenance records for warranty claims).
DTF Printer Maintenance Log — [Machine Model / Serial #]

Date       | Operator | Nozzle Check | W.Ink Shake | Capping Clean | Notes
-----------|----------|--------------|-------------|---------------|------
2026-06-10 | John     | ✅ Pass      | ✅ Done     | ✅ Done       | Normal
2026-06-11 | Maria    | ✅ Pass      | ✅ Done     | —             | —
2026-06-12 | John     | ⚠️ W gap     | ✅ Done     | ✅ Done       | Auto clean ×2, fixed

Weekly Tasks:
Date       | Encoder | Waste Ink | Tubes | Shaker | Oven | Notes
-----------|---------|-----------|-------|--------|------|------
2026-06-08 | ✅      | 60%       | ✅    | ✅     | ✅   | Normal

Monthly Tasks:
Date       | Dampers | Flush | Belt | Calibration | Firmware | Notes
-----------|---------|-------|------|-------------|----------|------
2026-06-01 | Replaced| ✅    | ✅   | ✅          | Updated  | W damper dark
When to Call for Professional Service
Know your limits. These situations require factory-trained technicians:
- Printhead replacement — improper installation can damage the carriage or mainboard
- Mainboard or power supply issues — electrical work voids most warranties if done by unauthorized personnel
- Full ink system conversion (e.g., switching ink brands) — requires complete flushing and ICC reprofiling
- Warranty-covered repairs — attempting DIY repairs on covered components voids the warranty
If your supplier doesn’t offer responsive technical support, you’re running your business on borrowed time. Evaluate your supplier’s after-sales capability using our 12-point supplier checklist.
Essential Maintenance Supplies
Keep these in stock. Running out of cleaning solution mid-clog is an avoidable crisis.
| Supply | Purpose | Est. Cost | Replace Frequency |
|---|---|---|---|
| DTF cleaning solution (500ml) | Manual cleaning, flushing, wet capping | $15–$30 | Every 2–3 months |
| Polyurethane foam swabs (100pc) | Capping station & wiper cleaning | $8–$15 | Monthly |
| Lint-free wipes (200pc) | Nozzle plate & exterior cleaning | $8–$12 | Monthly |
| 5ml syringe + silicone tube set | Deep flushing (severe clogs) | $5–$10 | Quarterly |
| Nitrile gloves (box) | Hand protection during cleaning | $8–$15 | Monthly |
| Spare dampers (full set) | Preventive replacement | $15–$40 | Every 1–2 months |
| Spare wiper blades | Capping station maintenance | $5–$15 | Monthly |
| Digital hygrometer | Environment monitoring | $10–$20 | One-time |
| Infrared thermometer | Oven temperature verification | $15–$30 | One-time |
For reliable consumable sourcing at factory-direct pricing (including OEM cleaning solutions and maintenance kits), see our DTF consumables wholesale guide.
FAQ
Q: How often should I clean my DTF printer?
A: Daily — nozzle check + white ink shake + capping station wipe (5–10 minutes). Weekly — encoder strip, waste tank, ink tubes, shaker (30–45 minutes). Monthly — dampers, line flush, calibration, oven cleaning (1–2 hours).
Q: Can I leave my DTF printer unused for a week?
A: It’s risky. White ink begins settling within 24 hours and can cause significant clogs after 48–72 hours. If you must leave it: run 2 cleaning cycles, perform a wet cap (2–3ml cleaning solution in the capping station), and enable sleep mode with auto-circulation if available. On return, shake white ink for 60 seconds, run 2–3 cleaning cycles, and check the nozzle pattern.
Q: What cleaning solution should I use for my DTF printhead?
A: Only use DTF-specific cleaning solution from your printer manufacturer or a reputable ink supplier. Never use Windex, ammonia-based household cleaners, or generic isopropyl alcohol — they can damage the printhead’s internal coatings and accelerate clogging (AAPS).
Q: How long does a DTF printhead last?
A: With proper maintenance: Epson i3200-A1 lasts 4–8 months in DTF conditions; XP600 lasts 3–5 months. Without proper maintenance, either can fail within weeks. White ink neglect is the #1 killer — not normal wear (Inkbank).
Q: Why is my white ink not printing even after cleaning?
A: Check these in order: 1) Is white ink level above 20%? 2) Are there air bubbles in the white ink tube? 3) Is the white damper darkened or clogged? 4) Try wet capping for 15–30 minutes. 5) If still blocked, the clog may be in the ink line — perform a syringe flush or contact technical support.
Q: Do I need to maintain the powder shaker and curing oven?
A: Yes — they’re part of the system. Weekly: clean the shaker mesh and empty the powder collection tray. Monthly: brush powder from oven heating elements (fire hazard) and check the exhaust duct for blockage. Neglecting these causes uneven powder application, incomplete curing, and potential fire risk.
The Bottom Line
DTF maintenance isn’t glamorous, but it’s the difference between a machine that prints profitably for years and one that becomes an expensive paperweight within months. The daily routine takes 5–10 minutes. The weekly routine takes 30–45 minutes. The monthly routine takes 1–2 hours.
The cost of ignoring it? $900–$3,000 for a printhead, $200–$500 for a service call, and 1–5 days of lost production each time. Every time.
Print the maintenance log. Train your operators. Keep supplies stocked. Your printer will repay you in uptime, consistency, and fewer 3 AM panic calls about a dead white channel.
For a complete breakdown of startup costs including maintenance budgeting, see our DTF business startup cost guide.
Related Reading
Factory-Direct Printing Equipment – Talk to the Source
Fujia Print manufactures DTF and UV printers in Guangzhou. Not a trading company, not a middleman. One supplier for your printer, consumables, and after-sales. Factory-direct pricing, in-house R&D, real support that answers the phone.
