

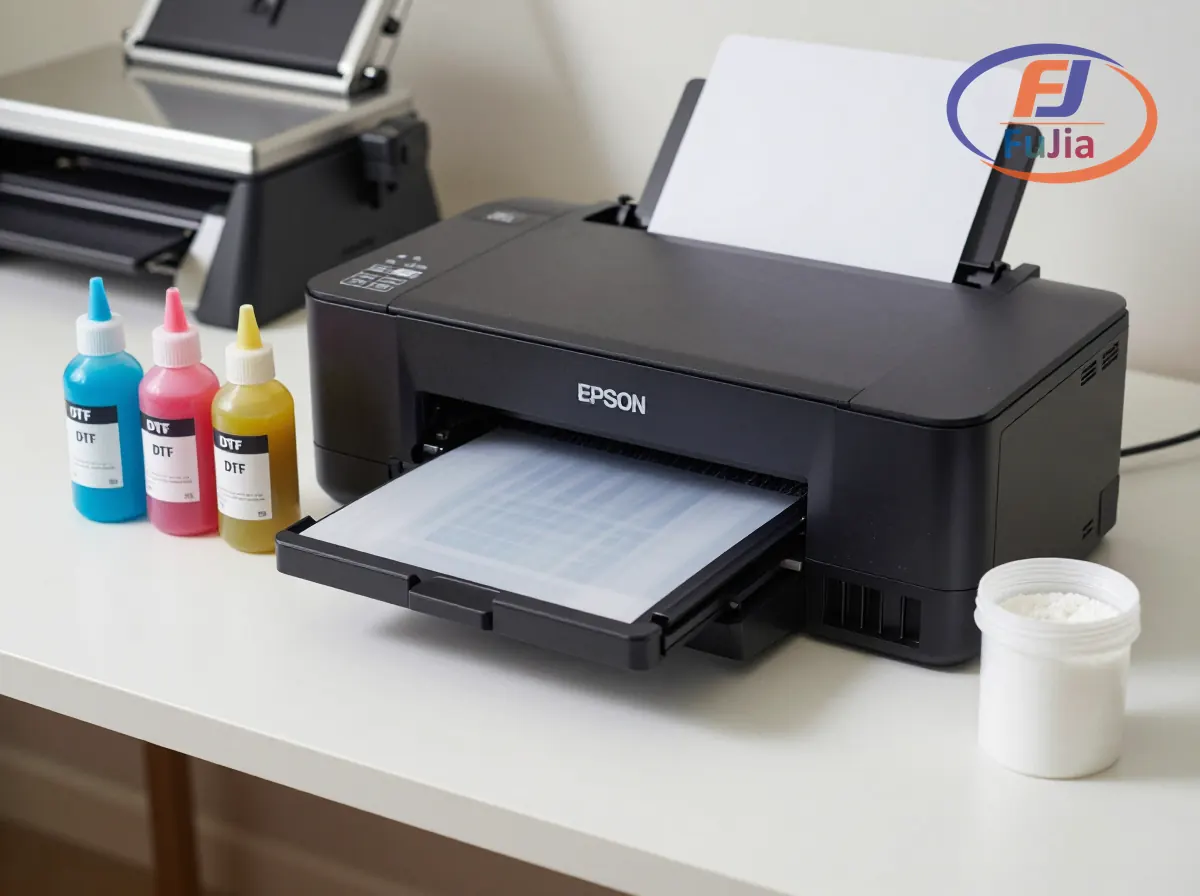
Making DTF transfers with an inkjet printer requires converting a piezo-head Epson model (L1800, ET-8550, or XP-15000) with a DTF conversion kit ($200-$800), loading CMYK plus white DTF ink through a continuous ink supply system, printing designs onto PET transfer film, applying hot-melt adhesive powder, curing, and heat-pressing onto fabric at 160 degrees Celsius for 15 seconds. The entire conversion-to-first-print process takes 2-4 hours and produces transfers rated for 50+ wash cycles on cotton, polyester, and blends.
Key Takeaways
- Only Epson piezo-printhead printers can be converted to DTF: thermal-head printers (Canon, HP) will not work
- A complete DTF conversion kit costs $200-$800, compared to $3,000-$10,000 for a dedicated DTF printer
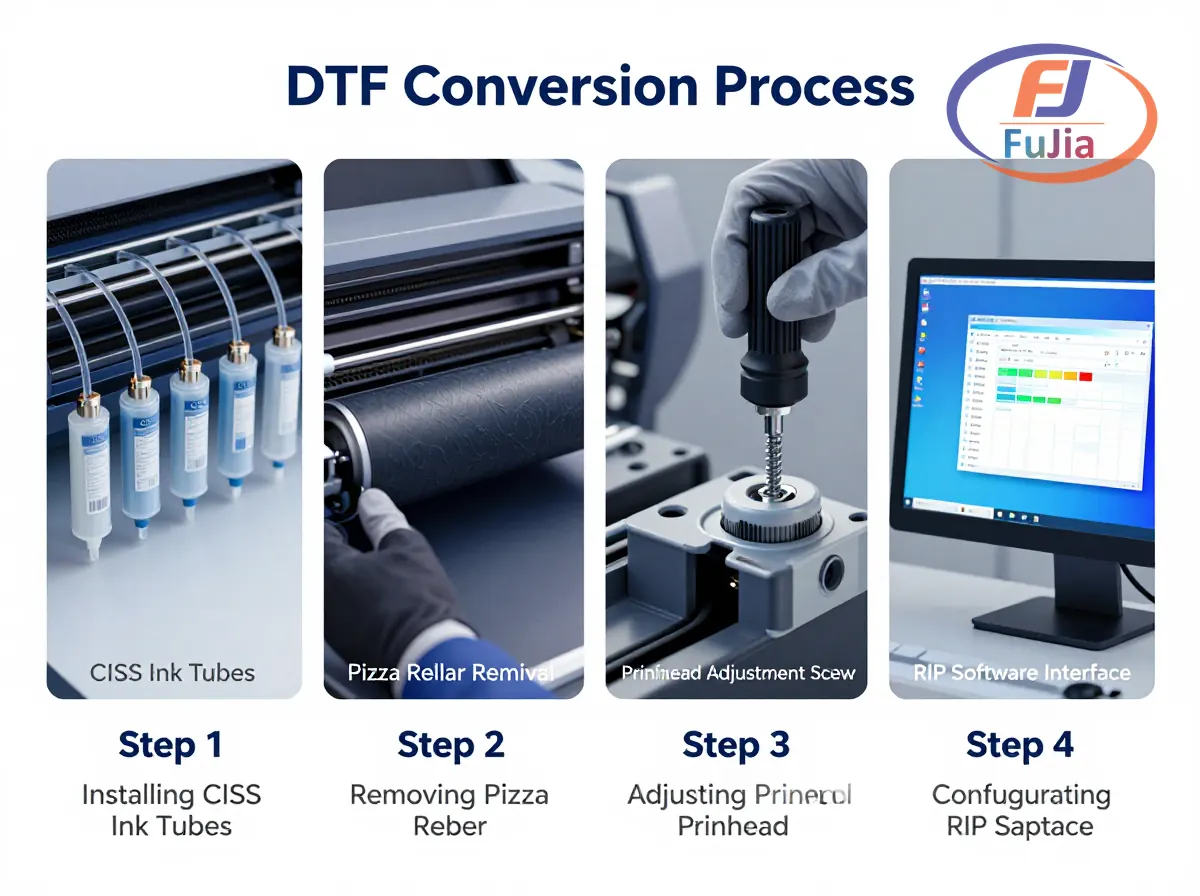
- The conversion involves 5 hardware steps: remove pizza rollers, adjust printhead height, install CISS, load DTF ink, install RIP software
- RIP software (AcroRIP, Maintop, Photoprint) manages white ink layering and color separation, which standard printer drivers cannot do
- DTF transfers made from converted inkjet printers achieve the same 50+ wash durability as dedicated DTF machines when properly cured
Can You Use a Regular Inkjet Printer for DTF?
No, a stock inkjet printer cannot produce DTF transfers without modification. Standard inkjet printers use dye-based or standard pigment inks that lack the adhesion properties needed for PET film, and they do not have a white ink channel, which is required for opaque transfers on dark fabrics. According to Wikipedia’s overview of inkjet printing technology, piezoelectric printheads (used by Epson) can handle a wider variety of inks than thermal printheads because they use mechanical pressure to eject droplets rather than boiling the ink. For a complete overview, see the Fujia DTF printer lineup guide.
Only printers with piezo printheads can be converted. Epson is the primary brand because all its desktop models use Micro Piezo technology. Canon and HP use thermal bubble-jet printheads that cannot handle DTF ink viscosity and will clog permanently within minutes of loading DTF ink.
| Printer Model | Printhead Type | DTF Compatible | Max Width | Conversion Difficulty |
|---|---|---|---|---|
| Epson L1800 | Micro Piezo | Yes (popular) | A3+ (33cm) | Moderate |
| Epson ET-8550 | Micro Piezo | Yes (popular) | 33cm | Moderate |
| Epson XP-15000 | Micro Piezo | Yes | A3+ (33cm) | Moderate |
| Epson ET-15000 | Micro Piezo | Yes | 33cm | Moderate |
| Canon PIXMA Pro | Thermal | No | – | Not convertible |
| HP Envy series | Thermal | No | – | Not convertible |
What You Need: DTF Conversion Supplies
| Item | Purpose | Price Range |
|---|---|---|
| Epson printer (L1800/ET-8550) | Base printer with piezo printhead | $300-$700 |
| DTF conversion kit | CISS tubes, dampers, exit tray, tools | $80-$200 |
| DTF ink (CMYK + White) | Pigment ink for PET film printing | $60-$150/liter |
| PET transfer film (A3 sheets) | Receives ink, carries design to fabric | $0.50-$2.00/sheet |
| Hot-melt adhesive powder (TPU) | Bonds ink to fabric during heat press | $15-$30/kg |
| RIP software | Controls white ink layering, mirror print | $50-$500 |
| Heat press | Transfers design from film to fabric | $150-$500 |
| Curing oven or flash dryer | Melts powder into ink layer | $100-$400 |
Total minimum investment for a DIY setup: approximately $500-$1,500, compared to $3,000-$10,000 for a dedicated DTF printer. The Fujia Print A3 DTF 1-Head (FJ-A30) offers a factory-built alternative at competitive pricing, with a single XP600 printhead producing 2-3 square meters per hour at 1440×1440 dpi maximum resolution. For an overview of the full DTF production process, see our article on DTF printer conversion options and explore DTF printers for home use if space is limited.
Step-by-Step: Converting Your Inkjet Printer
Step 1: Remove the pizza rollers.
Power on the printer and wait for the printhead to start moving, then immediately unplug the power cord to release the printhead from its parked position. Move the printhead to the right side. Remove the roller access door using a magnetic screwdriver, then loosen the baffle screws and lift out the front rollers (called “pizza wheels” because of their spiked shape). These rollers grip regular paper but leave track marks on wet DTF ink deposited on PET film. Reinstall the baffle and access door after roller removal.
Step 2: Adjust the printhead height.
DTF PET film (75 micrometers thick) plus the white ink underbase layer is thicker than standard copy paper. Without height adjustment, the printhead will scrape against the film and smear the wet ink. Loosen the silver screws on both sides of the printhead carriage, raise the black adjustment arm to the upper position, then tighten the screws. This increases printhead clearance by approximately 1-2mm, enough to accommodate the film and ink layers without contact.
Step 3: Install the DTF ink system.
Remove the factory ink tanks from the Epson printer. Connect the continuous ink supply system (CISS) tubes from the conversion kit to the printhead ink inlet ports, using tweezers to assist with the small connectors. Fill the CISS tanks with DTF ink in the correct channel order: cyan, magenta, yellow, black, and white. The white ink channel requires two tanks (duplicate channels) because white DTF ink contains titanium dioxide pigment that settles quickly and needs higher flow volume. Purge air bubbles from the tubes before the first print.
Step 4: Install RIP software.
Standard Epson printer drivers cannot manage a white ink channel or mirror images for transfer printing. RIP (Raster Image Processor) software intercepts the print job, separates colors, generates the white underbase layer, mirrors the image horizontally, and controls ink density. Popular RIP options include AcroRIP ($50-$150, beginner-friendly), Maintop ($200-$400, better color control), and Photoprint ($300-$500, professional). Install the RIP software, select your printer model, configure the ink channel mapping (white ink on channels 5-6), and load DTF color profiles (ICC).
Step 5: Test print on PET film.
Load a sheet of DTF PET film into the printer with the coated (matte) side facing up. Print a small test design at 720×1440 dpi. Check for: complete white ink coverage (no gaps on the underbase), sharp color edges (no bleeding), and clean nozzle patterns (run a nozzle check before printing). If white ink is patchy or missing, run 2-3 cleaning cycles. White ink clogs are the most common issue in converted DTF printers because titanium dioxide pigment settles in the printhead when the printer sits idle for more than 48 hours.
Making the Transfer: Print to Garment
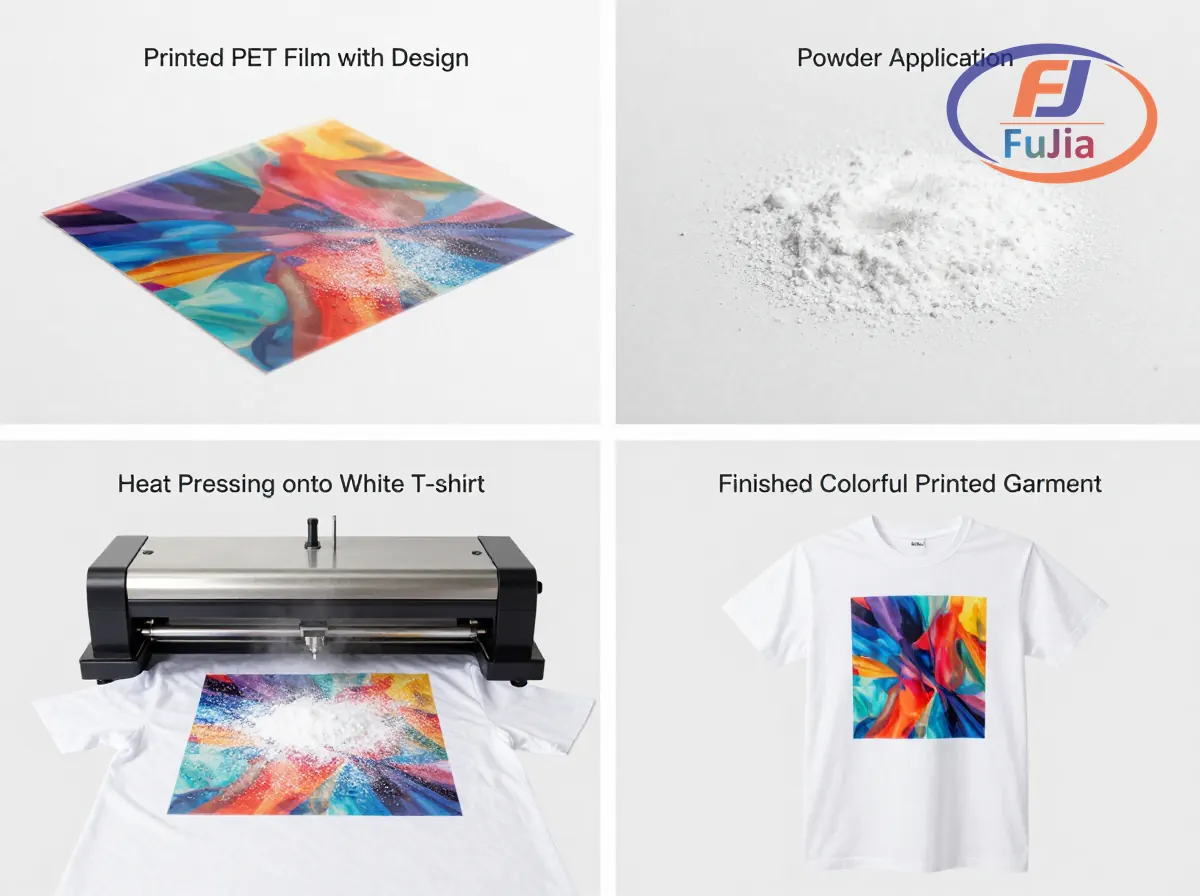
Step 1: Print the design mirrored.
Open your design in the RIP software. Enable mirror printing (horizontal flip) so the image appears correctly when transferred. Set white ink underbase to 70% or higher for dark fabrics. Print at 720×1440 dpi or higher for photographic quality. The printer deposits CMYK colors first, then overlays the white underbase on top (the white layer becomes the bottom of the transfer, sitting against the fabric).
Step 2: Apply adhesive powder.
While the ink is still wet on the PET film, sprinkle TPU (thermoplastic polyurethane) hot-melt adhesive powder evenly across the printed surface. The wet white ink layer captures the powder. Shake off excess powder by tapping the film edge or using a powder shaker machine. Powder that lands on dry areas of the film will not stick and must be removed to prevent specks on the final transfer.
Step 3: Cure the powder.
Pass the powder-coated film through a curing oven at 100-120 degrees Celsius for 2-3 minutes. Alternatively, use a heat press set to 120 degrees Celsius with the film placed powder-side up on a protective sheet, pressing for 30 seconds. The powder melts into a smooth, glossy layer bonded with the white ink. Undercured powder feels grainy and produces weak adhesion. Overcured powder yellows the white layer and reduces transfer opacity.
Step 4: Heat press onto fabric.
Place the cured film onto the garment with the printed (powder) side facing the fabric. Press at 160 degrees Celsius for 15 seconds with medium pressure (5-7 kg per square centimeter). For cold peel film, wait until the transfer cools completely (10-30 seconds), then peel the PET film away in one smooth motion. The design is now permanently bonded to the fabric with a durability rating of 50+ wash cycles at AATCC Grade 4-5 color fastness, based on data from the Fujia Print apparel printing application tested across cotton, polyester, and blend substrates.
Common Problems and Solutions
| Problem | Cause | Solution |
|---|---|---|
| White ink not printing | Clogged printhead from settled TiO2 | Run 2-3 cleaning cycles; print daily to keep white ink flowing |
| Ink bleeding on film | Humidity above 65% | Store film sealed at 35-65% RH; use dehumidifier in print room |
| Transfer peeling after wash | Insufficient press time or temperature | Verify 160C for 15s with medium pressure; use infrared thermometer |
| Cracking after 5-10 washes | Undercured powder | Increase curing time to full 3 minutes at 120C |
| Powder not sticking | Ink too dry before powdering | Apply powder within 30 seconds of printing while ink is wet |
| Film jamming in printer | Printhead too low or film loaded wrong | Verify printhead height adjustment; load matte side up |
Can I print DTF with an inkjet printer?
You can print DTF transfers with a modified inkjet printer, but not with a stock model. The printer must have piezoelectric printheads (Epson Micro Piezo), not thermal printheads (Canon, HP). Converting an Epson L1800, ET-8550, or XP-15000 requires removing the front rollers, adjusting printhead height, installing a continuous ink supply system (CISS) with DTF ink (CMYK + White), and installing RIP software to manage the white ink underbase layer. The conversion kit costs $80-$200 and takes 2-4 hours to install. After conversion, the printer deposits ink onto PET film instead of paper. The total investment for a complete DIY DTF setup (printer + kit + ink + film + powder + heat press) is $500-$1,500, compared to $3,000-$10,000 for a dedicated DTF printer. Converted printers produce transfers with the same 50+ wash durability as factory DTF machines when the curing and pressing parameters are followed correctly.
Can I convert a regular printer to DTF?
You can convert regular Epson inkjet printers to DTF, but you cannot convert Canon or HP printers. Epson uses piezoelectric (Micro Piezo) printheads that mechanically push ink droplets through nozzles, which can handle the thicker viscosity of DTF pigment ink including white ink loaded with titanium dioxide pigment. Canon and HP use thermal bubble-jet printheads that heat ink to create bubbles for droplet ejection. DTF ink’s higher viscosity and pigment load will clog thermal printheads within minutes, causing permanent damage. The most popular models for DTF conversion are the Epson L1800 ($400-$500, A3+ width), Epson ET-8550 ($600-$700, A3+ width), and Epson XP-15000 ($300-$400, A3+ width). Each requires a model-specific DTF conversion kit containing CISS tubes, dampers, and a modified exit tray. The conversion process is reversible: by reinstalling the factory ink system and rollers, the printer can return to standard inkjet use.
How do I make my own DTF transfers?
Making your own DTF transfers requires six steps after printer conversion. First, print your design mirrored onto PET transfer film using RIP software at 720×1440 dpi, with a white ink underbase at 70% coverage or higher for dark fabrics. Second, immediately apply TPU hot-melt adhesive powder to the wet ink on the film, shaking off excess. Third, cure the powder in an oven at 100-120 degrees Celsius for 2-3 minutes until it melts into a glossy layer. Fourth, place the cured film onto the fabric with the printed side down. Fifth, heat press at 160 degrees Celsius for 15 seconds with medium pressure (5-7 kg). Sixth, peel the film: cold peel (wait 10-30 seconds for cooling) for maximum durability, or hot peel (peel immediately) for softer hand feel. The finished transfer withstands 50+ machine washes with color fastness rated Grade 4-5 on the AATCC grayscale. A Brazilian creative studio using a Fujia Print A3 DTF printer (FJ-A30) followed this process to reduce per-order cost from R$18 to R$6.50, a 64% reduction compared to outsourcing transfers.
Can you use DTF paper in an inkjet printer?
You can load DTF PET film into a modified inkjet printer, but not into a stock model without DTF conversion. DTF film requires DTF-specific ink (CMYK plus white pigment ink) to bond with the coating. Loading DTF film into a standard Epson with factory dye ink will produce a smeared, non-adherent image that cannot be transferred to fabric. The film itself (75 micrometers PET with a 3-layer coating) is physically compatible with Epson piezo printheads, but the ink chemistry must match. DTF ink costs $60-$150 per liter compared to $20-$50 per liter for standard dye ink, and requires a continuous ink supply system with wider tubes to handle the higher viscosity, especially for white ink. The white ink channel is the critical missing component in stock printers: without RIP software managing white ink output, there is no opaque underbase layer, and transfers on dark fabrics will be transparent and unusable.
Conclusion
Converting an Epson inkjet printer to DTF costs $500-$1,500 total and produces transfers rated for 50+ washes. The process requires a piezo-printhead Epson model (L1800 or ET-8550), a DTF conversion kit, RIP software, and consistent daily printing to prevent white ink clogging. For production reliability without conversion complexity, explore Fujia Print DTF printers or learn about DTF transfer film specifications to match film to your printer width.
