

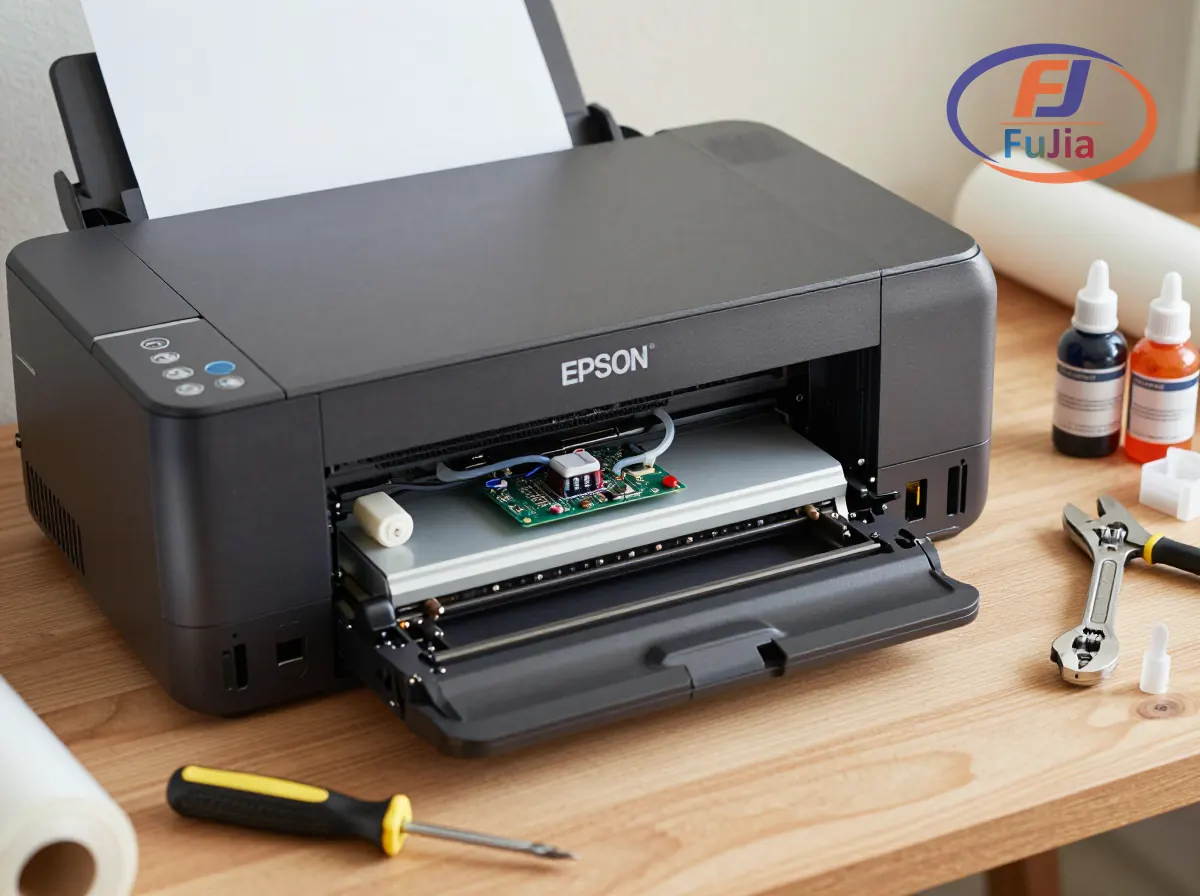
Converting a printer to DTF requires an Epson inkjet with piezoelectric printheads (L1800, ET-8550, XP-15000), a DTF conversion kit ($80-$200), CMYK plus white DTF ink ($60-$150/liter), PET transfer film, TPU adhesive powder, RIP software ($50-$500), and a heat press. The conversion process takes 2-4 hours and involves removing front rollers, adjusting printhead height, installing a continuous ink supply system, and configuring RIP software for white ink layer management. Total cost ranges from $500 to $1,500, compared to $3,000-$10,000 for a factory-built DTF printer.
Key Takeaways
- Only Epson piezo-printhead printers can be converted: Canon and HP thermal printheads clog permanently with DTF ink
- The Epson L1800 is the most popular conversion base ($400-$500, A3+ width, well-documented process)
- Conversion voids the Epson factory warranty, which may not matter for printers already out of warranty
- White ink management is the leading failure point: without daily circulation, TiO2 pigment clogs the printhead within 48 hours
- A converted DTF printer produces the same 50+ wash durability as factory-built models when properly maintained
Which Printers Can Be Converted to DTF
For a complete overview, see the Fujia DTF printer lineup guide.
Not all inkjet printers can become DTF printers. The critical requirement is a piezoelectric (piezo) printhead that uses mechanical pressure to eject ink droplets, rather than a thermal printhead that boils ink to create bubbles. According to inkjet printing technology documented by Wikipedia, piezo printheads accommodate a wider variety of inks because they do not require the ink to have volatile components for bubble formation.
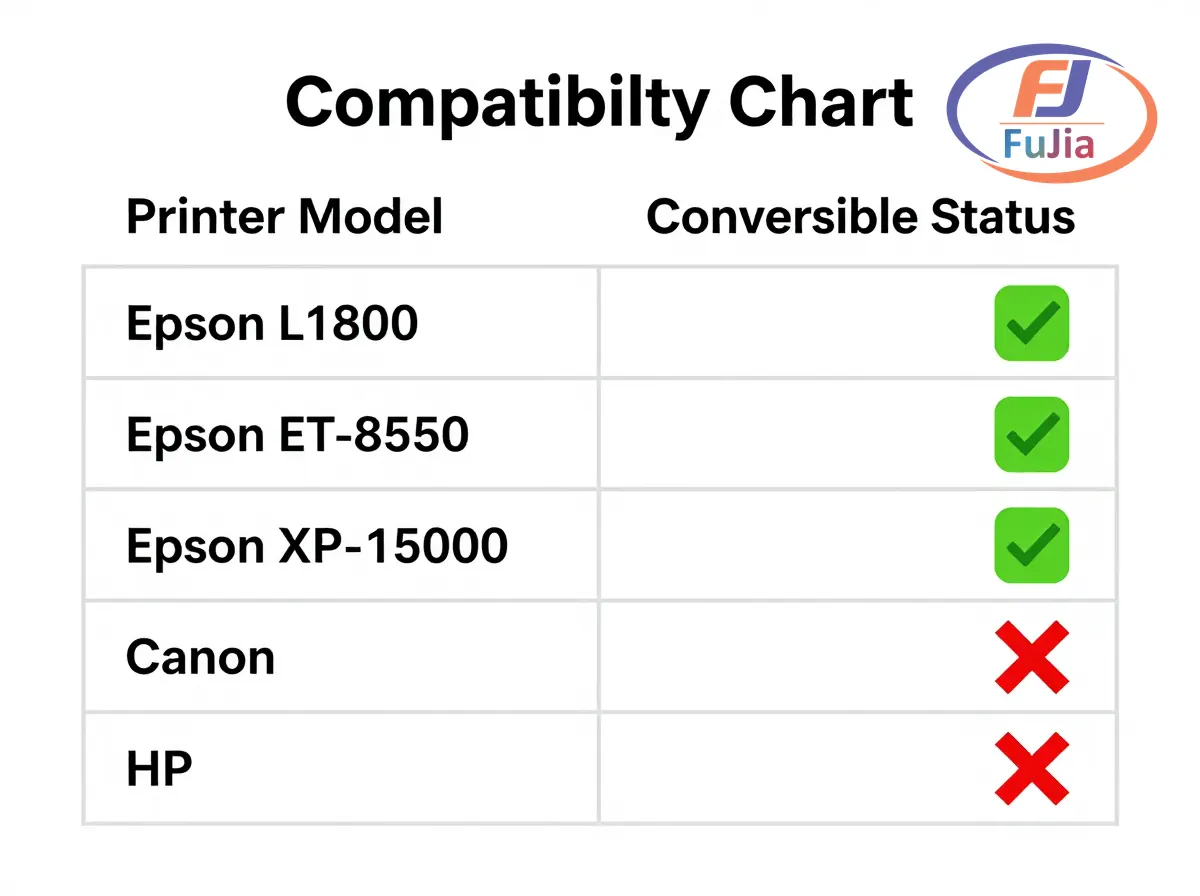
| Printer Model | Printhead Type | Max Width | Price | DTF Conversion |
|---|---|---|---|---|
| Epson L1800 | Micro Piezo (6-color) | 33cm (A3+) | $400-$500 | Best choice, widely documented |
| Epson ET-8550 | Micro Piezo (6-color) | 33cm (A3+) | $600-$700 | Popular, EcoTank system |
| Epson XP-15000 | Micro Piezo (6-color) | 33cm (A3+) | $300-$400 | Budget option |
| Epson ET-15000 | Micro Piezo (4-color) | 33cm (A3+) | $400-$500 | 4-color only, no LC/LM |
| Epson L805 | Micro Piezo (6-color) | 21cm (A4) | $200-$300 | Smaller width |
| Canon PIXMA Pro | Thermal (FINE) | Various | Various | NOT convertible |
| HP Envy/OfficeJet | Thermal (Thermal Inkjet) | Various | Various | NOT convertible |
The Epson L1800 remains the gold standard for DTF conversion because it has a 6-channel ink system (CMYK + Light Cyan + Light Magenta), which can be remapped to CMYK + White + White + spare. The ET-8550 offers the same capability with a factory EcoTank system that simplifies ink loading. The XP-15000 is the cheapest viable option but requires more firmware modifications.
Conversion Kit Components
A complete DTF conversion kit contains:
| Component | Purpose | Kit Price Range |
|---|---|---|
| CISS (Continuous Ink Supply System) | Replaces factory ink tanks with larger external bottles | $40-$80 |
| Dampers with coarser filters | Filter TiO2 pigment before printhead | $10-$30 |
| Modified exit tray | Replaces factory tray that smears wet DTF ink | $10-$25 |
| Tool set (magnetic screwdriver, tweezers) | Disassembly and reassembly | $5-$15 |
| Firmware reset utility | Bypasses ink level warnings after CISS install | $15-$50 |
| Total kit cost | $80-$200 |
Additional purchases required: DTF ink set (CMYK + White, $60-$150/liter), PET transfer film ($0.50-$2.00/sheet), TPU adhesive powder ($15-$30/kg), RIP software ($50-$500), heat press ($150-$500), and optionally a powder shaker/curing oven ($200-$800).
Step-by-Step Conversion Process
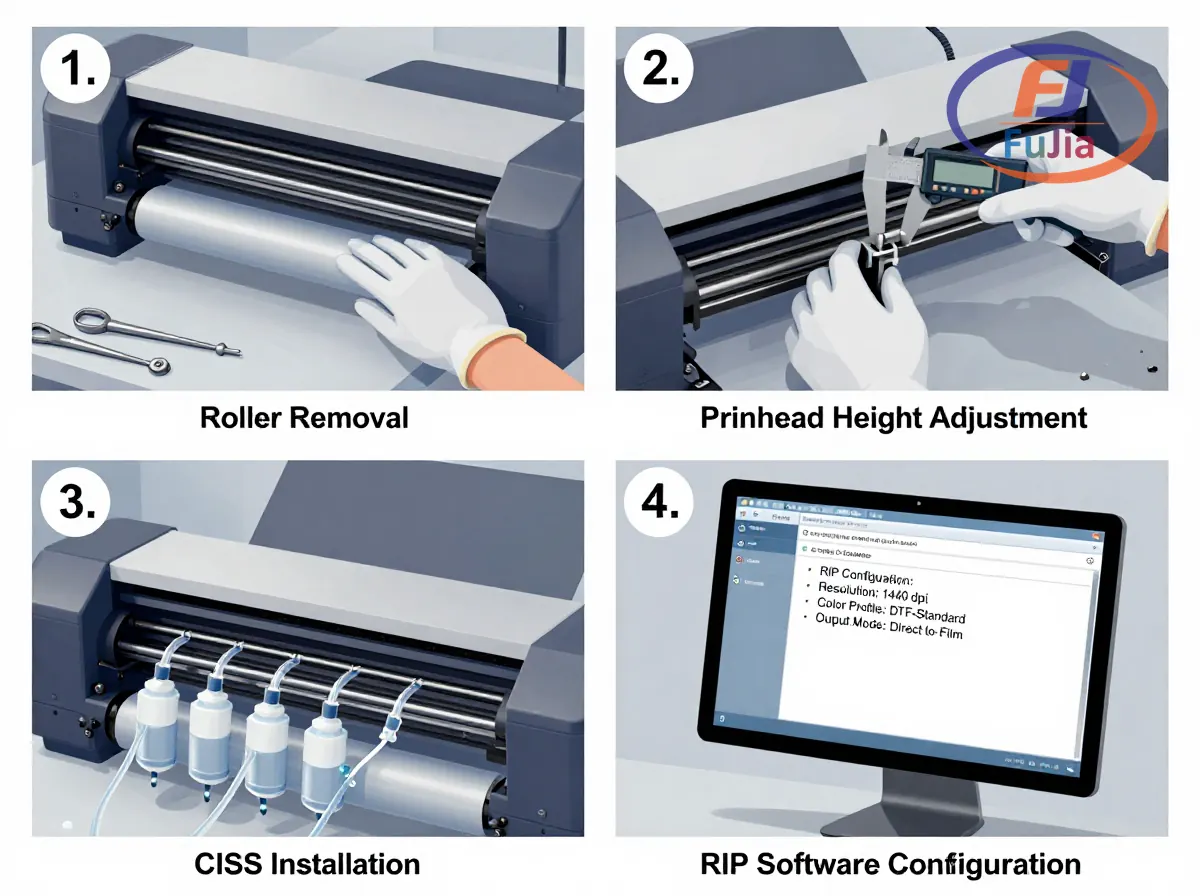
Step 1: Disassemble the printer exterior.
Power on the printer. When the printhead begins to move from its parked position, immediately unplug the power cord. This releases the printhead lock so you can slide it manually. Remove the front cover and roller access door using a magnetic screwdriver. Keep all screws organized in labeled bags.
Step 2: Remove the pizza rollers.
The front paper rollers (called “pizza wheels” due to their spiked shape) grip standard paper but leave track marks on wet DTF ink deposited on PET film. Loosen the baffle screws holding the roller assembly, lift the roller out from the left side first, then slide it free. Reinstall the baffle plate and access door without the roller.
Step 3: Adjust printhead height.
DTF PET film (75 micrometers) plus the white ink underbase layer is thicker than standard copy paper. Without height adjustment, the printhead scrapes against the film and smears ink. Locate the silver adjustment screws on both sides of the printhead carriage. Loosen each screw, raise the black adjustment arm to the upper notch position, then retighten. This increases clearance by approximately 1-2mm.
Step 4: Install the CISS ink system.
Remove the factory ink cartridges or tanks. Connect the CISS tubes from the conversion kit to the printhead ink inlet ports. Fill the CISS bottles with DTF ink in the correct channel order. The white ink channel requires duplicate mapping (two channels feed white ink to ensure adequate flow rate for the viscous TiO2 pigment ink). Purge air bubbles from all tubes using a syringe before the first print.
Step 5: Install RIP software.
Standard Epson drivers cannot manage white ink or mirror images. Install RIP software (AcroRIP, Maintop, Photoprint, or Flexi) and configure it for your specific printer model. Map the ink channels: CMYK on standard channels, white ink on channels 5-6. Load DTF ICC color profiles for accurate color reproduction. Set the white ink density to 70% for dark fabrics and 40-50% for light fabrics.
Step 6: Test and calibrate.
Load a sheet of PET film with the coated (matte) side up. Run a nozzle check to confirm all channels are firing. Print a small test design with white underbase. Check for: complete white coverage, sharp color edges, and clean nozzle patterns. Run 2-3 cleaning cycles if white ink is patchy. Apply adhesive powder and heat press at 160 degrees Celsius for 15 seconds to produce your first DTF transfer.
Common Conversion Failures and Solutions
| Problem | Cause | Solution |
|---|---|---|
| White ink not printing after 48hr idle | TiO2 pigment settled in printhead | Print daily; install automated circulation pump ($30-$60) |
| Ink smearing on PET film | Printhead too low | Re-adjust printhead height screws to upper position |
| Film jams in printer | Exit tray removed but film catches on edge | Install modified exit tray from conversion kit |
| Colors look wrong | ICC profile not loaded in RIP | Download and install DTF-specific ICC profiles |
| Printer firmware rejects CISS | Epson firmware update blocks third-party ink | Use firmware downgrade utility or chip resetter |
| Printhead fails within 6 months | Original Epson head not rated for white ink | Accept shorter lifespan or buy factory DTF printer |
Converted vs Factory DTF Printer
| Factor | Converted Epson | Factory DTF (Fujia Print) |
|---|---|---|
| Total cost | $500-$1,500 | $3,000-$10,000 |
| Setup time | 2-4 hours DIY | Plug and play, 3-day onboarding |
| Printhead warranty | Voided | 2 years |
| White ink circulation | Manual or add-on pump | Automatic, runs during power outages |
| Print speed | 2-3 m2/hr (desktop) | 8-27 m2/hr (industrial) |
| Printhead lifespan | 6-12 months (not rated for white ink) | 18-24 months (industrial-rated) |
| Parts availability | Self-sourced from third parties | 48-hour factory dispatch |
| Daily maintenance | 5-10 minutes | 3-5 minutes |
The conversion path makes sense for hobbyists testing DTF viability with minimal investment. For production shops running 4+ hours daily, a factory-built DTF printer delivers lower total cost of ownership within 6-12 months due to printhead replacement frequency and downtime. For a deeper comparison, read our DTF printer conversion guide or explore factory-built DTF printers.
Which printers can be converted to DTF?
Only Epson inkjet printers with piezoelectric (Micro Piezo) printheads can be converted to DTF. Compatible models include the Epson L1800 (best choice, 6-color, A3+ width at $400-$500), Epson ET-8550 (popular, EcoTank system at $600-$700), Epson XP-15000 (budget option at $300-$400), and Epson L805 (A4 width at $200-$300). Canon and HP printers cannot be converted because they use thermal bubble-jet printheads that boil ink to create droplets. DTF ink has higher viscosity than standard ink, and thermal printheads clog permanently within minutes of loading DTF ink. The conversion requires a DTF kit ($80-$200) containing CISS tubes, dampers, and a modified exit tray, plus RIP software ($50-$500) for white ink management. For more details on the conversion process, see our DTF printer parts guide.
How much does it cost to convert a printer to DTF?
Converting a printer to DTF costs between $500 and $1,500 total. The breakdown: Epson L1800 or ET-8550 base printer ($300-$700), DTF conversion kit with CISS and dampers ($80-$200), DTF ink set CMYK + White ($60-$150/liter, need 2-3 liters to start), PET transfer film ($25-$75 for 50 sheets), TPU adhesive powder ($15-$30/kg), RIP software ($50-$500 depending on brand), heat press ($150-$500), and basic tools ($5-$15). The conversion kit alone is $80-$200 but does not include consumables or the heat press. By comparison, a factory-built DTF printer like the Fujia Print A3 DTF 1-Head (FJ-A30) costs $500-$1,500 complete with warranty, eliminating the conversion labor and printhead compatibility risk. The total investment matches the converted approach but with 12-month warranty and factory support.
Does converting a printer to DTF void the warranty?
Yes, converting an Epson printer to DTF voids the manufacturer warranty. Epson warranties cover only the printer in its original configuration using genuine Epson ink. Installing a CISS with third-party DTF ink, removing the pizza rollers, adjusting the printhead height, and running RIP software all constitute modifications that Epson service centers will reject under warranty claims. The conversion is most practical for printers already out of warranty (Epson L1800 launched in 2015, so most units are beyond the 1-year warranty period). For in-warranty printers, the conversion risk includes total printhead failure with no manufacturer recourse. Factory-built DTF printers from Fujia Print include a 12-month warranty covering printhead replacement, with parts dispatched within 48 hours and lifetime WhatsApp engineering support, eliminating the warranty void risk entirely.
Can I convert a Canon or HP printer to DTF?
No, Canon and HP printers cannot be converted to DTF. Both brands use thermal bubble-jet printhead technology (Canon calls it FINE, HP calls it Thermal Inkjet) that heats ink to 300 degrees Celsius to create a bubble that forces the droplet out of the nozzle. DTF ink contains titanium dioxide pigment particles at 15-25% concentration by weight, which is too viscous for thermal printheads to handle. Loading DTF ink into a Canon or HP thermal printhead causes immediate nozzle clogging within minutes, followed by permanent printhead damage. Only piezoelectric printheads (Epson Micro Piezo, Brother) can mechanically push viscous DTF ink through nozzles without heating. If you own a Canon or HP printer, the only path to DTF printing is purchasing a separate Epson printer for conversion or buying a factory-built DTF printer.
Conclusion
Converting a printer to DTF costs $500-$1,500 and requires an Epson piezo-printhead model, conversion kit, and RIP software. The conversion takes 2-4 hours but voids the warranty and produces shorter printhead lifespans. For production reliability, explore Fujia Print DTF printers or read our DTF printer conversion guide for a deeper comparison of DIY versus factory-built.
